 It’s not what you think. My head is not spinning. I am not joining a spin class at the gym and I am certainly not watching spiders spin their webs (creepy!).
So what is spinning then?
I have been spinning my own hand-spun yarn, that’s what!
In my last post, I alluded to working on a side project that has overtaken some of my knitting time. I have fallen in love with art of hand-spinning. But what is even better, my new spinning past-time compliments my knitting passion perfectly!
So what drove me to want to make my own hand-spun yarn? Well, it started with a television series with a scene that showed an actor spinning on spinning wheel (any guess to what show I am referring to?). I thought to myself, that looks so relaxing. I also thought that making my own hand-spun yarn could save a lot of moolah. Some of that gorgeous hand-spun yarn at the local yarn shop is dreamy but also really expensive!
In order to turn my little day-dreams of spinning into reality, I needed to do some research. Should I get a wheel? Well, I wish I could afford wheel, but alas they are not cheap to buy. At this point in my day-dreaming, I liked the idea of spinning, but in reality, I could hate it. Now what is a girl to do?
I proudly introduce the humble drop-spindle!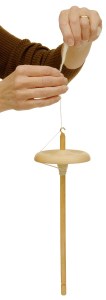
I had no idea that this little tools could do such amazing things and have such a long rich history. So first off,
what is a drop spindle? According to Wikipedia, “A spindle is a straight spike usually made from wood used for spinning, twisting fibers such as wool, flax, hemp, cotton into yarn. It is often weighted at either the bottom, middle, or top, commonly by a weighted object called a whorl. Spindles come in many different sizes, styles and weights depending on the thickness of the yarn one desires to spin.”
As I continued my research I found that there were many positives to learning and using a drop-spindle over a spinning wheel. First off, a drop-spindle is much cheaper. Pre-made ones can range from $20-$80. You can also make your own spindle for under $2 dollars and are super easy to make – I even made three spindles in one night! (I promise will post the instructions on how to make your own soon.) Another reason a drop-spindle is more awesome than a wheel is that it is super-portable. Just drop your spindle and some fluff in a bag and you are good to go!
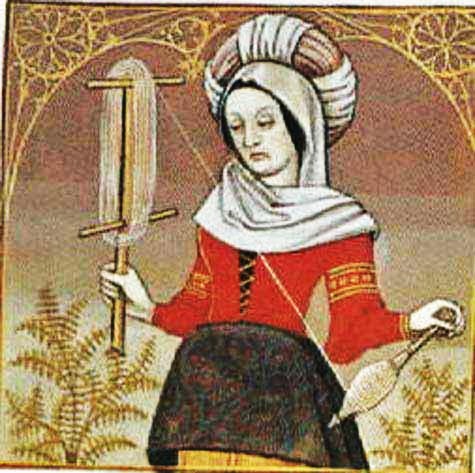 Remember that rich history I mentioned earlier? Once again, Wikipedia states “For thousands of years, fiber was spun by hand using simple tools, the spindle and distaff. Only in the High Middle Ages did the spinning wheel increase the output of individual spinners, and mass-production only arose in the 18th century with the beginnings of the Industrial Revolution.” I discovered that some of the most famous art in history depict women in the act of spinning. Even the beautiful arm-less sculpture of ‘Venus de Milo‘ is hypothesized to have been originally sculpted with her spinning. If you were to re-attach her arms, some believe they fall in the exact position that a spinner’s arms would be – how cool is that?
After all these positives, I was sold on the idea of drop-spindling. Now I just needed to decide the method of learning, what type of spindle I would get, and where I would get my fluff from (a.k.a. fiber to spin).
The learning part was the easiest task to overcome. There are a plethora of resources available online and in the local library. Here are my top picks for learning resources:
BOOKS:
Respect the Drop-Spindle by Abby Franquemont (One of the most complete resources of drop-spindling out there on the market. The book goes into great detail without overwhelming you. I loved learning about the author’s history with spinning on a spindle; very enjoyable!)
Start Spinning with Maggie Casey ( This book covers both drop-spinning and wheel spinning. Plenty of picture and clear concise writing offers an introduction to the world of spinning and gently guides you to which method of spinning might work best for you.)
DVDs:
Respect the Spindle with Abby Franquemont (This video is a great introduction to spinning on a drop-spindle and offers loads of advice to get you spinning your first project)
Getting Started on the Drop Spindle with Maggie Casey (This is great way to learn the basics of drop-spinning. I watched this video three times already and keep discovering tips I missed the first time around!)
ONLINE COURSES:
Craftsy.com: Spindling, From Fluff to Stuff with Drucilla Pettibone (a wonderful online class that gently guides you from start to finish. Best of all you get to interact with other students and the teacher to help you through your first project!)
ONLINE ARTICLES
Spinning Daily: How-to Section (a site that has tons of free downloadable ebooks and articles on spinning)
Knitty.com: Got Spin? ( a great article that has an awesome chart for spindle weights and yarn weight)
YOU TUBE VIDEOS
DN Knitting Corner: Spinning YouTube Playlist ( I have too many videos I like on YouTube so here is a convenient playlist for you to view)
 Next I needed to find out which type of spindle I would use. Should I go with a top-whorl, middle-whorl, or bottom-whorl spindle. Should it be supported or suspended? What style should I go with? Traditional, Ankh, Turkish, Navajo, or Russian spindle? I won’t go into differences of the numerous styles of drop-spindles here. Unfortunately, there is too many to explore and this post is getting long enough as it is….
At first, I purchased and started to use a commercially made Turkish style drop-spindle from KnitPicks which can be used a top-whorl or bottom whorl. At the time, I thought this was a perfect choice since I wasn’t sure if I should get a top-whorl or bottom-whorl spindle. This type of spindle ended up being too light for me to start off with, so as I mentioned earlier, I ended up making my very own top-whorl spindle. (Don’t worry my Turkish spindle will still be put to use after I master the basics)
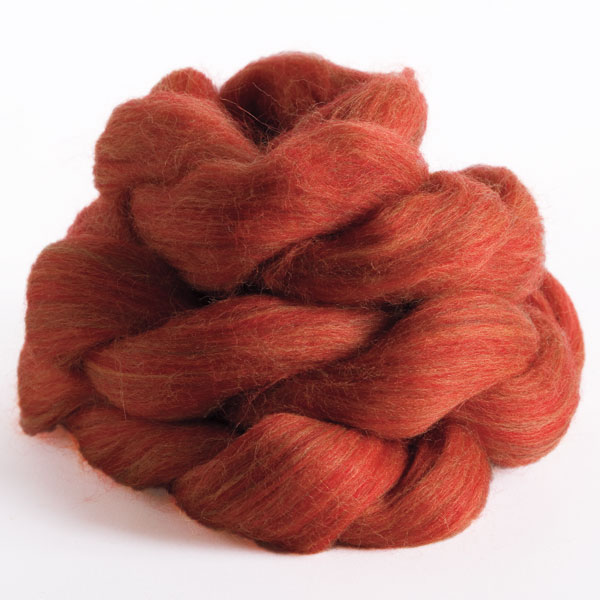 Finally, I needed some fluff to spin into yarn. I already knew I wanted to stick with wool as my fiber of choice since it is readily available and easy to work with. Lucky for me, KnitPicks offers a nice range of un-dyed and commercial dyed roving wool. Roving, BTW, refers to how the wool was prepared after it was sheered from the sheep. Again, I won’t explore of the various wool/animal fiber preparations here. I will just have to save this topic for another time.
To continue, I picked out some lovely roving that was an un-dyed Andean wool and included a beautiful dyed orange-red Andean wool with my purchase. Armed with my spindle, wool, videos and online class, I was off spinning!
The rest, as they say, is history. I have been spinning and knitting my free-time away and occasionally sneaking in an art sketch here and there (check out my other blog DN Art Corner if you are curious what I have been doing in the art world).
For now, I leave you with a picture of my first project (still in progress) and will continue to post my progress.

Up next: I am almost finished with the first round of roving and will decide how I will ‘ply’ my newly spun yarn. That is definitely a topic for another time: how to ply my yarn, how scary is that?
Until next post…


5 responses to “My head is Spinning!”
Wow … so intricate, so detailed, so mind-blowing. What patience you have my dear. All in all, I am so proud of all that you do, what you have pursued, what you have taught yourself, and the amazing work that you produce!
Thank you very much for your kind words and encouragement 🙂
There is a way to unwind the single strand onto your hand so you can pull both strand off without getting tangled up. It is called “Andean” plying, I think.
I start by wrapping the end several times around my thumb so I don’t lose it. Then wrap around the wrist
Around the middle finger
Go back the way you came
Around the Palm-side of the wrist
To the back of the hand
Around the middle finger
Back the way you came
Repeat.
This creates a lot of criss crosses on the back of the hand. Pull the yarn up the Palm a little bit, but not all the way. Just enough to get your (now purple) middle finger out. Push the yarn back down to your wrist. You now have a very loose bracelet.
Remember that end you wrapped around your thumb? Take that end and the other end together and attach it to your spindle.
When you ply, you must remember to soon in the opposite direction. Your single is spun “upward” so your ply must be spun “downward.” The crosses are on the back of the hand, and the yarn pulls off with very little difficulty.
BTW, when I ply two bobbins, they are never equally matched. One bobbin always has some left over. I use this method to spin that bit up so I don’t waste anything.
I made my own first drop spindle, too. Then I trashy myself how to knit just to keep up with my growing stash! You did a great job on all counts.
Thank you so much for the advice and tips! I may give this type of plying a try, I was also looking at navajo plying since it also uses only one spool of single ply yarn. I will hopefully be posting my results soon. It’s been slow going since I try to do too much in a single day LOL
I’ve never tried chain plying on a drop spindle. I look forward to your results.